

The Wrong Way to Paint with Gouache | Basics of an Underpainting
The Wrong Way to Paint with Gouache
Artists often use an underpainting to establish values in a work of art. Da Vinci and Rembrandt used underpaintings to block out the white of the canvas and establish the middle values in the painting quicker; this speeds up the painting process. This technique was called imprimatura, a process of building layers fat over lean. Layers of color were built over time beginning with the most transparent layer and gradually painting the most opaque, “thick” layers at the end. This was done because oil and acrylic paintings can crack. How does this apply to watercolors or gouache?
Do gouache artists create underpaintings?
Well, in my experience gouache artists usually don’t create an underpainting. Some do use gouache as an underpainting; Recently I saw a gouache artist teaching a course for beginners who recommended using gouache for the underpainting. This artist would water down the gouache similar to watercolors and use this as the base layer of the painting. Their muted palette of browns and grey made sense, because layers of gouache keep reactivating and the colors would turn brown. When gouache artists do an underpainting, we typically choose watercolors for the first layer.
The reason for this is because watercolors are transparent, absorb into the paper, and don’t reactivate when they are made wet again after they have dried into the paper.
In the video demonstration, I will show you the difference between an underpainting made with gouache and an underpainting made with watercolors. There is no right or wrong way, but I personally feel there is a right way to get a painting that looks clean, professional, and like you understand the limitations of the materials. That’s why I made this video. If a beginner were to pick up a gouache set and follow the guidance of an artist who recommends a gouache underpainting, the beginner painter might get frustrated. They might feel as though they are fighting with the painting, as each layer of paint they put over the last begins to mix until their painting turns muddy. I’m going to show you why this could happen and how to avoid it.
Supplies for the gouache underpainting demo
I’m using the Himi Jelly Gouache Set I purchased off of Amazon. It’s an affordable starter kit in case you are interested in trying out a set of gouache paints that are on the cheap side. I mention this because if you choose to use Acryla gouache this demo will not work. Acryla does not reactivate when it’s wetted. It dries with a plastic texture.
I’m also using Windsor & Newton watercolors for the second part of this demo. These are great professional paints if you’re looking for a set of watercolors.
Gouache Underpainting vs Watercolor Underpainting Demo
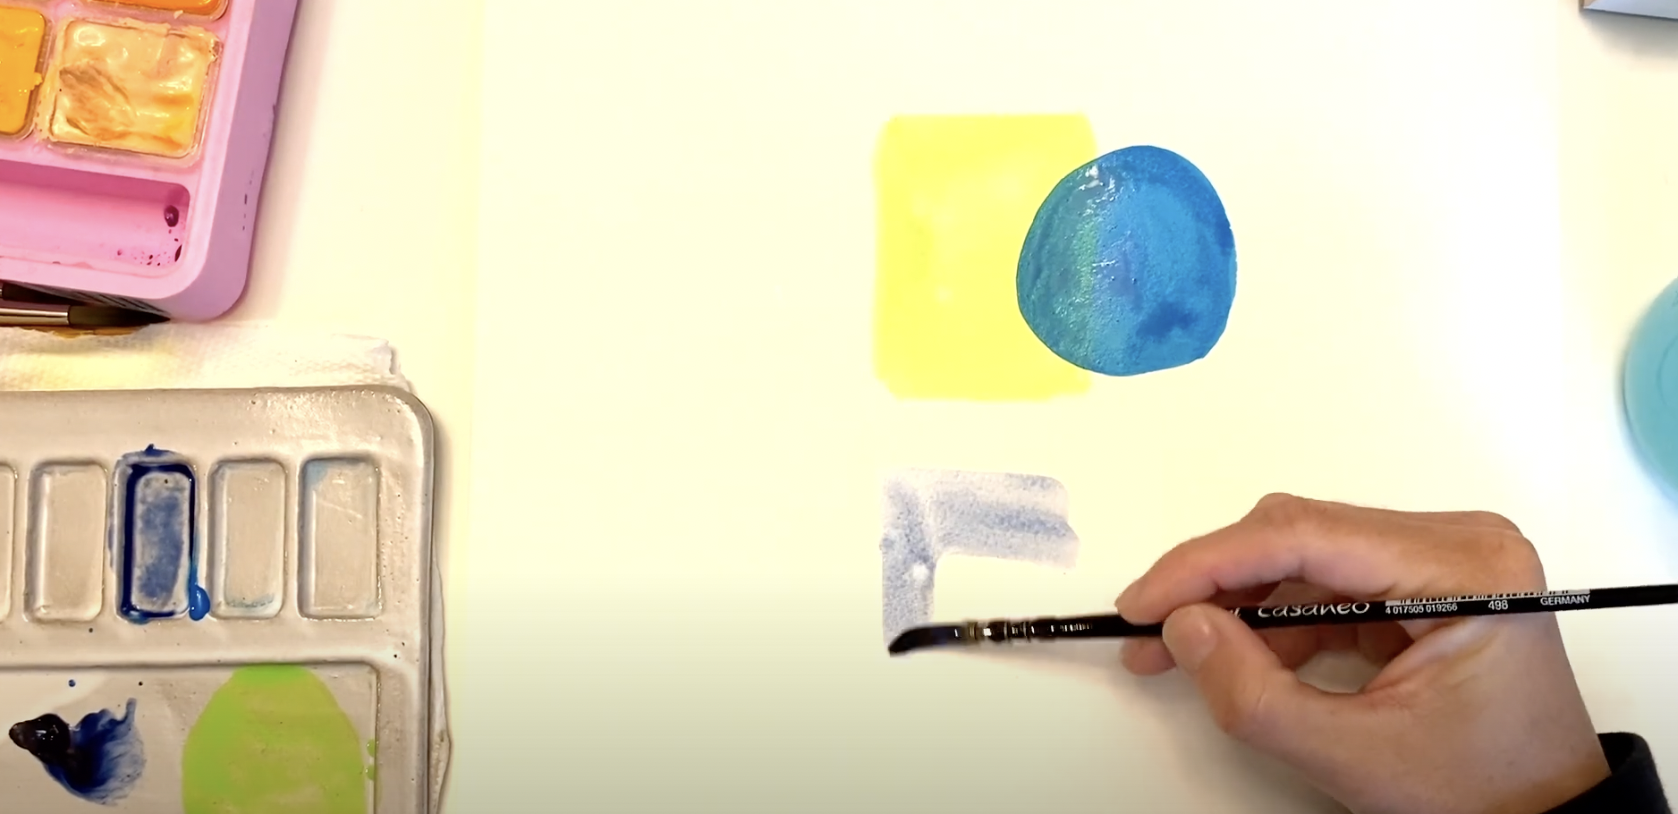
In the first demo, I painted the underpainting using a light green. You’ll want to allow the gouache to dry completely. Because gouache is thicker naturally and more opaque, the material takes longer to dry. It sits on top of the paper, unlike watercolors. Watercolors absorb into the paper. You can feel this if you run your hand across the paper.
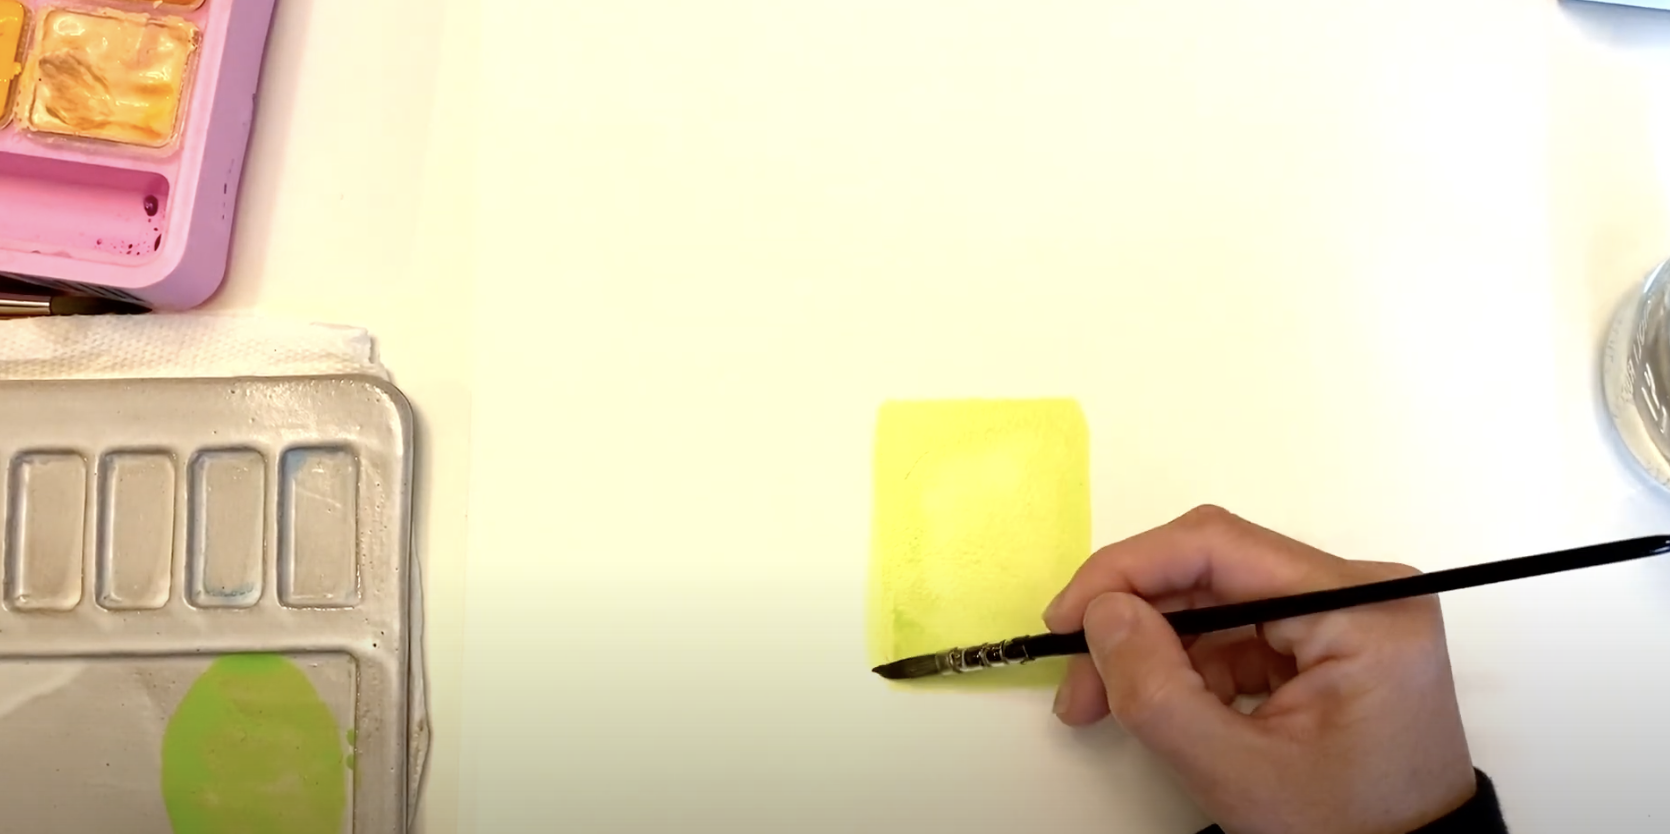
Wait until the first layer is completely dry and then you can apply the circle like I do above. You’ll notice that the more water you have, the more messy and more likely puddles are going to happen on the first layer. Both layers begin to blend together. This is definitely an undesired effect if you do not want these two colors to mix, or you want to keep the flat and smooth texture of the layer you already painted.
The colors will change. Since with gouache the colors will look different when they are dry, unlike watercolors, this can make the materials even more frustrating and unpredictable. Since you won’t know the color they will be when dry, there is the added element that these two colors have now mixed together.

The green line has almost completely disappeared. The more I rub the blue color on top of the rectangle, the more the colors mix and the green rectangle disappears underneath.
Watercolor Underpainting with Gouache Layers
In this second part of the demo, I’m using watercolor for the underpainting. You’ll notice that the watercolors are thinner, lighter, and you can see the paper through them. They dry quicker than the gouache. They also dry into the paper.
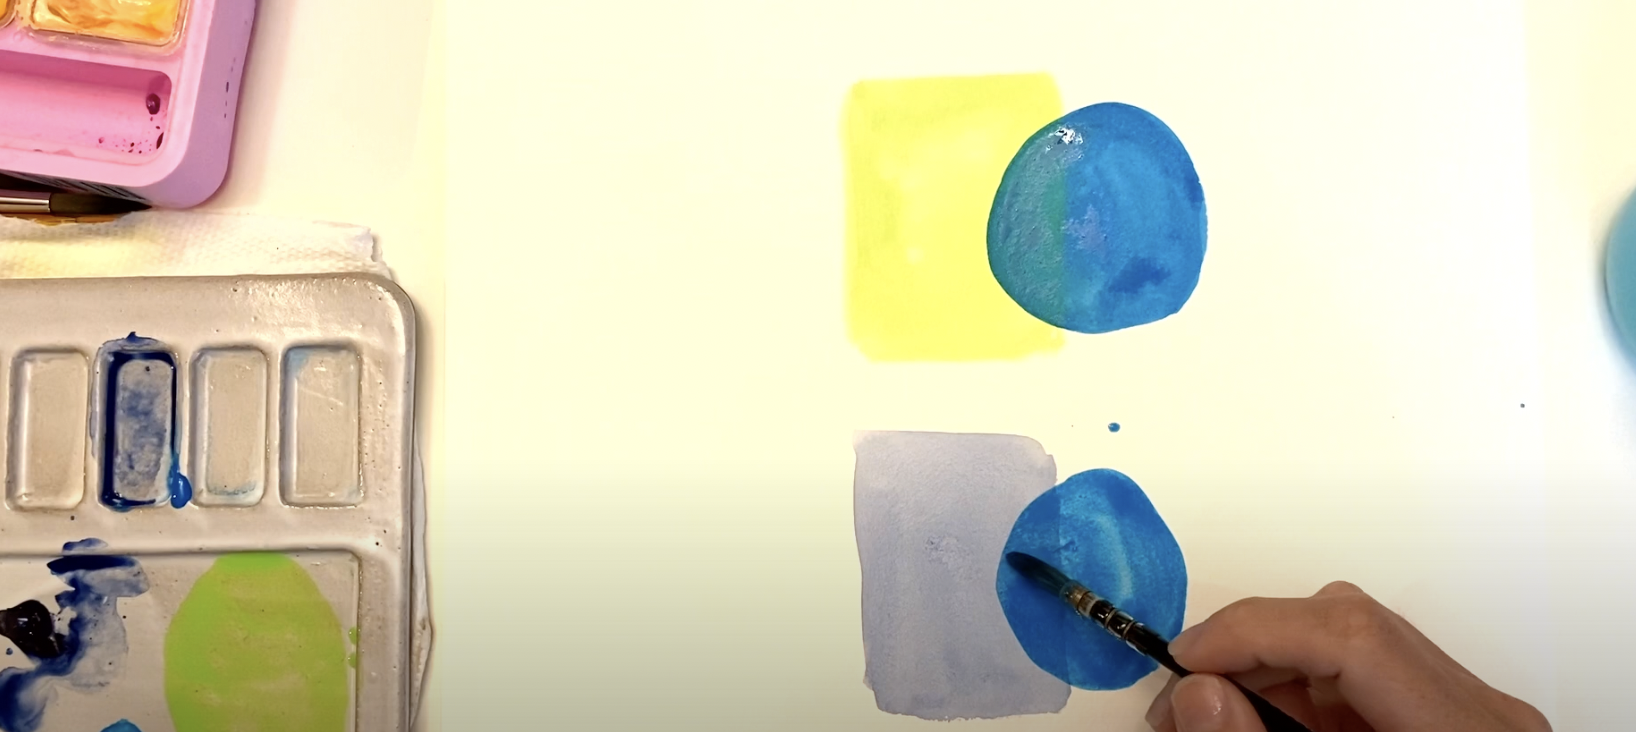
After the watercolors dry, apply a thick layer of gouache over the top. You’ll notice that the rectangle shows through the circle. Unlike the top example, there is a clear line showing the rectangular underpainting. This would work well if you are painting a landscape and need to establish middle values in your painting.
Why Pick Watercolors for the Underpainting
Keeps your colors vibrant
Prevents muddy colors
Preserves lies
Establishes middle values without preventing you from going dark too quickly
Keeps your underpainting light enough to allow for error correction
Does not reactivate after drying on paper
In conclusion, the gouache underpainting works if you are trying to achieve a shade between two colors. The gouache layer reactivates when wet and mixes with each layer above it. This can cause you to get muddy colors if the wrong color is applied above it. However, if you choose to use the second option with a watercolor underpainting, you can layer and the colors will not mix together. This is a more traditional way of painting because it leads to more vibrant colors.
Sign up to the newsletter to receive more articles about painting technique and projects.